Step 1
Upon initial log in, a screen will display some records that need to be mapped to complete your setup. The mapping screen will display all of the information gathered from your setup.
The left column displays information received from the customer’s platform and is NOT EDITABLE.
The centre column provides the customer with drop-down options for mapping, which have already been set up by TECHNOPATH.
The right column provides the option to disable the flow of data for a specific item.
If you do not want to receive information for a specific item simply select the minus (-) from the drop-down option. The same logic is applied for mapping of all information, i.e instruments, test codes and sample/control lot identifiers.
Please go to section 3.1g of the IAMQC™ User Manual for more information.
Step 1

Step 2
TO COMPLETE ANY OUTSTANDING MAPPING
Click on SETUP and select LABORATORY DEMOGRAPHICS from the drop down menu.
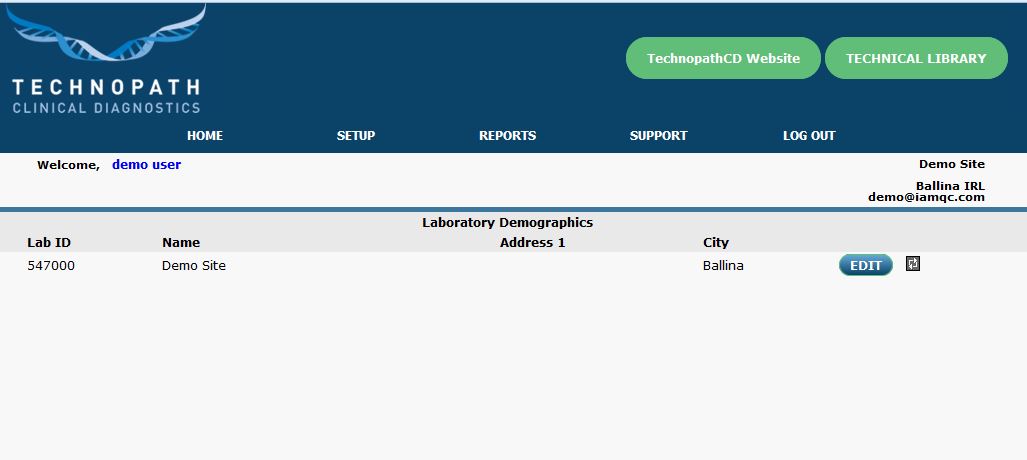
Step 3
The Laboratory Demographics Home Page will now be displayed.
Click on the grey Communicator Icon next to the button.![]()
The system will displays options for setting up new communicators, click ‘NEXT’.

Step 4
The Communicator Setup displays, click ‘NEXT’.
Step 4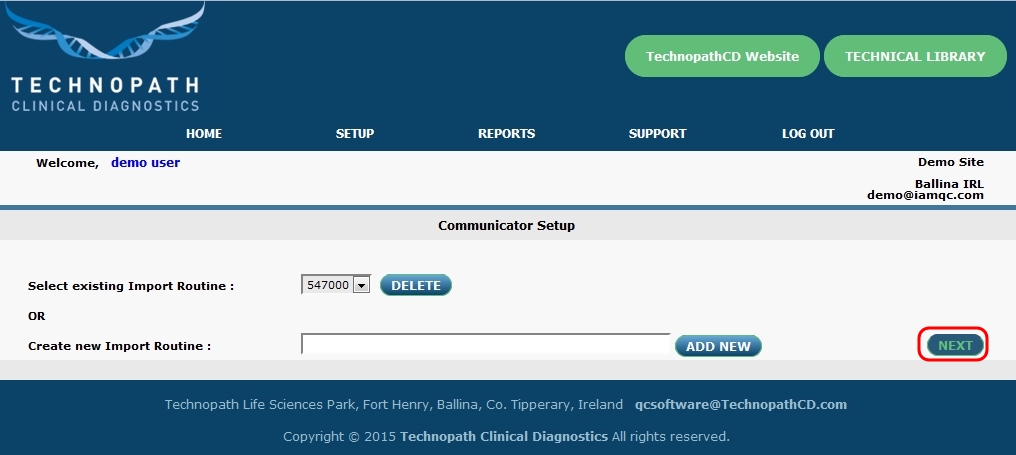
Step 5
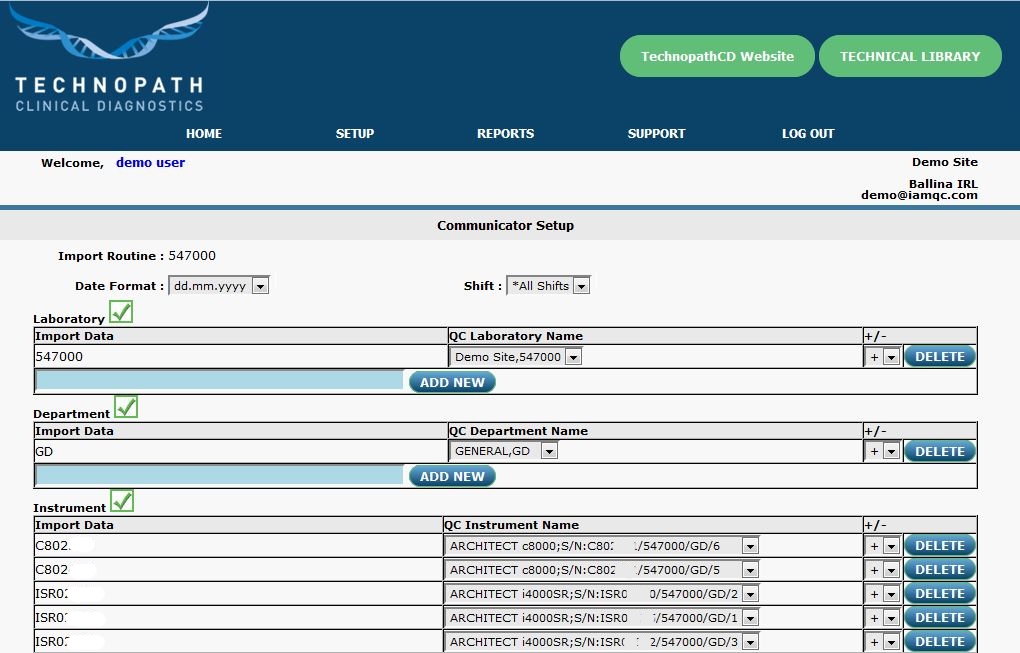
The system now displays all mapping associated with your account.
Mapping that is incomplete displays a red icon beside the section header.
Un-mapped items display “No Selection” in the middle column.
Click on the ‘NO SELECTION’ window to view all available items in a drop-down menu.
Click on the relevant item to map it to the information shown on the left column.
Once all of the mapping is complete, the system should display a green check mark beside each section header.

Step 6
It is recommended that you ensure every item on the list is mapped appropriately.
Click ‘EXIT’ to return to the Home Screen.
Notes
If the system does not display the required information in the drop-down menus to complete your setup, please contact your local representative.
Notes